
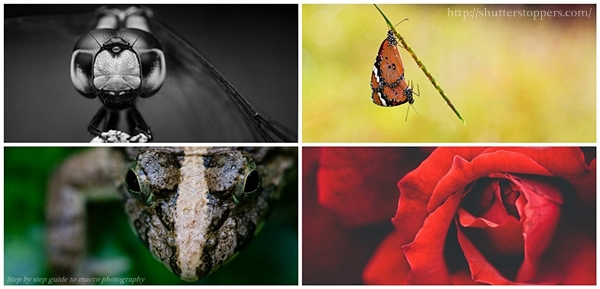
Macro Photography — Step by Step Guide for Beginners (Part1)
In one of my previous posts I gave a brief introduction on macro photography. I know that reading that post will not help you in macro photography. So I decided to write a step by step guide to macro photography for beginners. This post is part one of the step by step guide to macro photography. In this post, I am going to explain the equipment required, and important settings for macro photography.
Equipment required for Macro Photography
Well, you don’t require any expensive equipment for macro photography although lenses and other accessories for macro photography are quite expensive; they only make your work easier. It doesn’t mean that you require them for macro photography. You can take macro photographs even using your mobile phones. Some mobile phone cameras have macro function that allows you to take close up photos. So there is no ‘special’ camera out there for macro photography.
I have listed the pros and cons of each type of digital camera in one of previous posts. If you haven’t read it yet, please read:
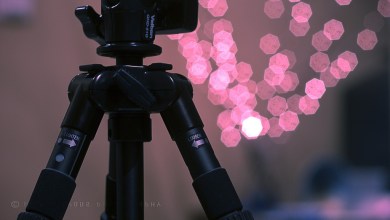
Other accessories: External flashes, diffusers, tripod, bellows, macro focus sliders, extension tubes, reverse ring are some of the accessories commonly used for macro photography. I will explain their uses and importance later in this guide.
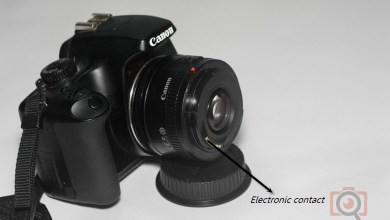
If you are a DSLR user and you don’t have a dedicated macro lens, you can use the reverse lens technique to take macro photos. You can read my post on how to set up a reverse lens for macro photography.
Now that you know what you wanted for macro photography, let me help you to take some macro photographs. In this post, I will explain the recommended camera settings for macro photography. And my next post will be a field guide where I explain about composition, framing, lighting in macro photography.
Understand your camera settings
Before reading on, I highly recommend you to use your camera’s manual for a reference. It will help you to access and understand various settings I am going to explain here. Anyway, I will try to generalize as possible as I can.
Whether you have a point and shoot or a DSLR camera, make sure you are familiar with various settings. You can use automatic, semi- automatic, or manual mode.
Macro mode: Macro mode is an automatic mode available in all cameras – even it’s available in some mobile phones. When you select ‘macro mode’, the camera selects the widest aperture possible and let you focus close to the subject.I use this mode when I use a mobile phone camera or a basic compact camera. The symbol for macro mode is ![]() .
.
Semi-automatic modes: Various semi-automatic modes are aperture priority, shutter priority, program mode. In aperture priority and shutter priority modes, you can select the aperture and shutter speed respectively, and the camera selects the other exposure settings. Aperture priority mode is my preferred mode for macro photography using a macro lens.
Manual Mode: In manual mode, you have full control over the exposure settings. That is, you have to evaluate the exposure and set the aperture, shutter speed and ISO settings. I use this mode when I take high magnification macro photographs where I have to use a double exposure since I use an external flash for fill light. I shall discuss more on this later.
Aperture settings
Aperture in digital cameras does two things: it controls the amount of light getting into the camera, and the depth of field. Depth of field is one of the important aspects in photography. As you may know, the depth of field and aperture are related to each other. That is, wider the aperture, shallower the depth of field (more blur) and vice versa. Other factors that affect the depth of field are distance to the subject, focal length of the lens, and the magnification of the subject.
One can get artistic by choosing the right aperture and thereby controlling the depth of field. A shallow depth of field will help you to avoid background clutter, but making it too shallow will cause loss of details in the subject. So, choose the right combination of the above-mentioned factors which control depth of field.
If you want to know more about Aperture and how it use it, please read:
Shutter speed settings
Shutter speed determines how long the shutter is left open for making an exposure. So it controls the light getting into the camera. However, if you don’t choose your shutter speed wisely, you may not get good results. For example, a slow shutter speed makes your image looks blurry thereby loosing sharpness in your image. The rule of thumb is that if you use a lens of focal length 100mm, then your shutter speed should be a minimum of 1/100s to avoid blur my internal vibrations in the camera (NOTE: assuming you are using a full frame sensor. If not, you should multiply the crop factor to the shutter speed – in a 1.6x crop factor sensor the shutter speed while using the same lens would be 1.6×100 = 1/160s) One of the main reasons I get bad results in my macro photography is the blur due to slow shutter speed.
Read:
ISO settings
ISO rating is the sensitivity of your digital camera’s digital sensor. High ISO rating means the image sensor is more sensitive to light and vice versa. So in low light conditions, you can use a high ISO for selecting a desired shutter speed to avoid blurry shots. However, choosing a higher ISO adds noise to the images which results in loss of details. So, choose the ISO wisely. You should know your camera well for this. That is, noise by high ISO depends on the sensor size – if the image sensor is large (as in DSLR cameras) noise is not apparent at high ISOs. But If the image sensor size is small (point and shoot cameras and mobile phone cameras) noise will become apparent even at mid-range ISO like ISO 400.
Putting the above factors together
Since the aperture; ISO; and shutter speed determines the exposure, changing one of these settings affect the other two. For example, if you want to select a fast shutter speed to avoid blurry photos, you should either change ISO or aperture to get a standard exposure. I will explain more on this later.
Okay. I hope you got an idea about the exposure settings on your digital camera. You may have noticed that I haven’t told you how to set the exposure. That is because we are not on the field now. I just gave you an idea about one of the important settings on your digital camera. I will explain how to use them in when we are on the field (Part 2 of this post)
Other settings
Below are some of the settings that will help you to get good results in macro photography.
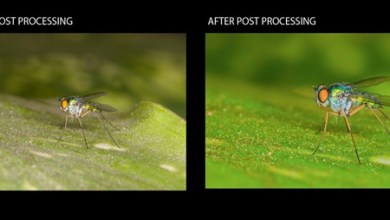
RAW format: If your digital camera allows you to shoot in RAW file format, use it. All DSLR cameras and some point and shoot cameras, mirrorless cameras offer RAW file format. Shooting in RAW helps you to capture good detail and allows you to have full control over the image in post processing. If your camera does not capture in RAW, make sure you set the highest image resolution.
Read:
White balance setting: If you are shooting in RAW, it doesn’t matter what balance setting you are using since you can easily change them in post processing. But if you are shooting in jpeg mode, setting a proper white balance is highly recommended since White balance determines the accuracy of colors in the photographs.
Read:
- Introduction to white balance
Metering mode: Almost all digital cameras allow you to change different metering modes. Common metering modes are – Matrix/evaluative, average, spot, partial metering modes. Metering evaluates the exposure of a scene and helps you to set a proper exposure. I will discuss more about this in part 2.
Focus settings: Well, this is obvious. You have to focus on something. But where do you focus? In insect macro photography, you have to focus on their eyes. Getting a well-focused image is really important in macro photography. When it comes to focusing, it is recommended to use manual focus instead of automatic focus. During autofocus, the camera hunts focus by searching areas of contrast. Eventhough the camera locks the focus; it doesn’t give you a sharp image most of the time. So when you use manual focus, you can lock the focus on your point of interest. Another advantage of using manual focus is that you can pre-focus. It is helpful for capturing subjects that are restless and constantly moving.
So, I am sure you are ready for some macro photography now. Above are some of the important settings you should know before going for [macro] photography. In part 2 of this guide, I will show you how to take macro photographs and how to use the above settings for getting the best results.
If you like this post and don’t want to miss the part 2 of this guide, please subscribe us or join us on our facebook page
Thats really Nice Tips……
Very useful tips.
I’m planning to buy dslr. I’ve done lot of reading and searching over the net. Finally I’ve shortlisted Nikon 3300 and Canon EOS 600D. The lens would be 50mm f/1.8. I’m still not able make a final decision on which dslr body to go with. Can you help me with your useful comments before I make a wrong decision and repent?
Thanks in advance.