Click the image for an enlarged view
In this post, I am showing you how to fix over sharpened images using photoshop.
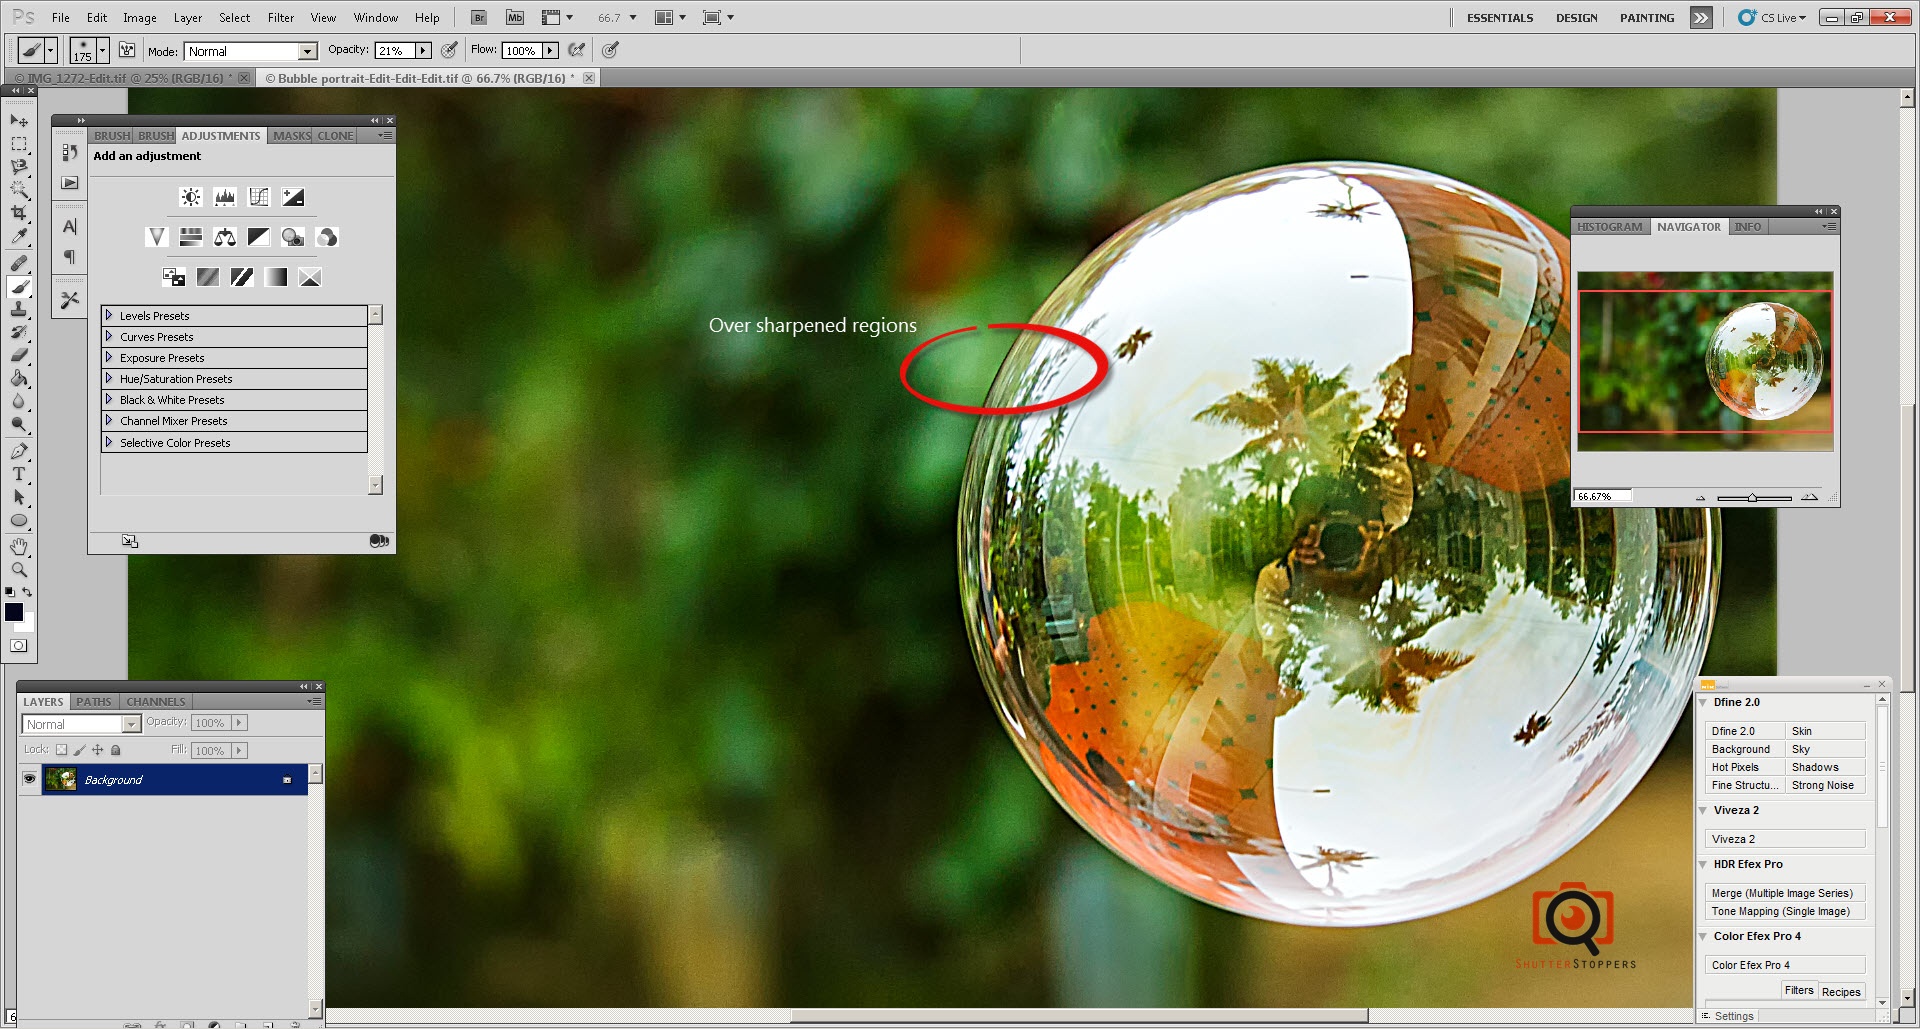
What is image sharpening and how can you say than an image is over sharpened?
Sharpening an image will make it pop out, and there are various sharpening tools or softwares available today which will help you to sharpen your images to such an extent that will even beat the image quality of a high end digital camera. However, this will not be the actual sharpness, and that’s why you cannot sharpen a blurred image. These softwares sharpen images by increasing the contrast of adjacent pixels. So it will give an illusion that the image is sharp. How can you say that an image is over sharpened? Well, it just doesn’t look good. It can be identified either as noisy images or as white or black region near the edges. (see the image below)
Click the image for a larger viewStep 1: Once you open the image in photoshop, duplicate the layer as shown below.
Create a new layer from the backgroundStep 2: Go to filter, blur, and Gaussian blur
Step 3: Select a radius depending upon the degree of sharpness in your image. However, it is okay to select a high radius since you are applying it on a new layer rather than the original image. You can decrease the amount of blur by changing the opacity. Click OK and the image will be blurred.
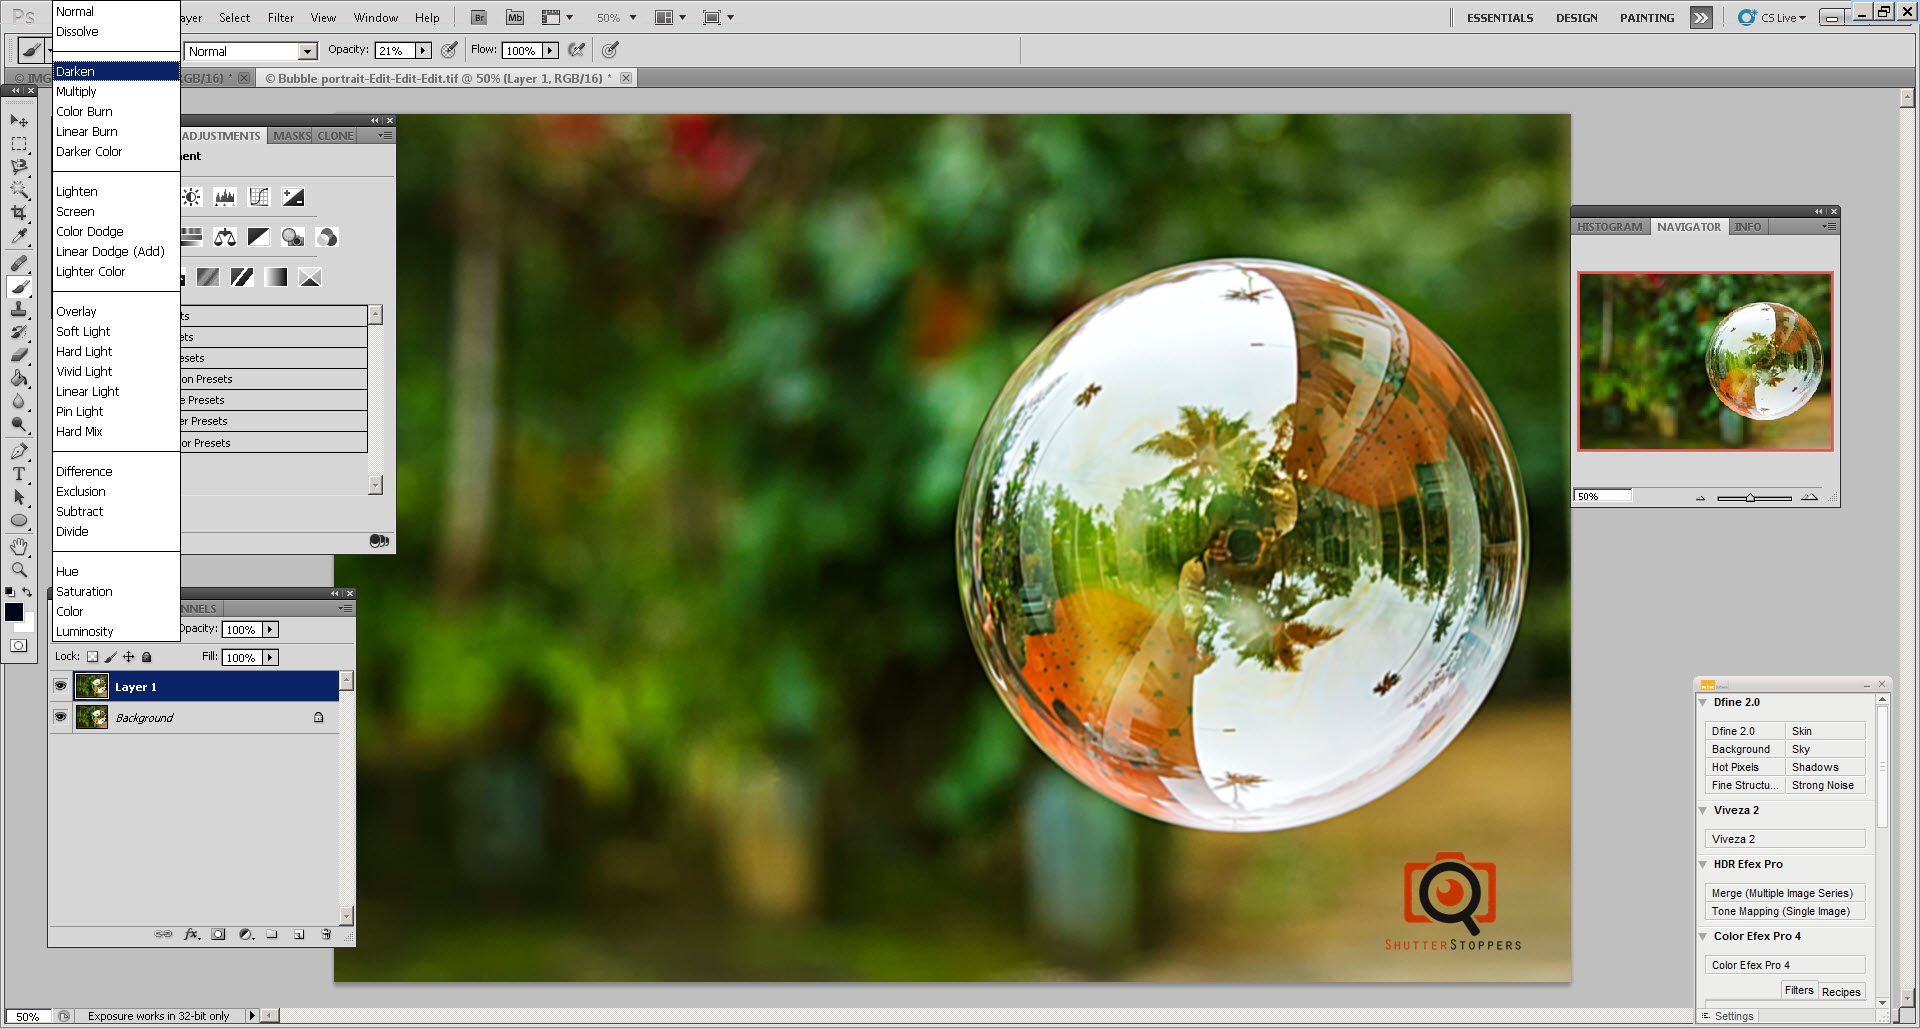
Step 4: Change the blending mode to ‘darken’ which will make the image soft and the overall sharpness came back to a good level. Adjust the opacity of this layer for appropriate sharpness.
Change blending mode to ‘darken’Step 5: Right click on the top layer, where you have applied the effect, and click ‘flatten image’
Result:
NOTE: I would strongly recommend you to not include this method in your workflow. Use this method to fix those over-sharpened images you have. It will not bring those images back to good condition. Instead of using this method, just avoid over-sharpening your images.
This post was last modified on September 19, 2017 4:33 PM
Exposure triangle is the most fundamental aspect of digital photography. Without understanding it, you cannot master exposure in digital photography.…
Reverse lens technique is very easy to set up. It is a cheap solution for macro photography. You normally…
About Jayanth Sharma I don’t think Jayanth Sharma needs an introduction from me. He is a wildlife photographer…
Night photography is a fascinating type of photography. I agree night photography might seem too technical for beginners; they are…
The depth of field in an image is how much of the picture is in focus (area of image in focus).…
Photoshop workflow is inevitable for a fashion photographer. Most of the work is done in photoshop to improve the aesthetics…